Pages

Monday, February 15, 2021

Dr. Z Loses Power in Zoom Class

NOOOOOOOO!!!!!!

Even though I have made a reputation for teaching other educators how to use Zoom; regardless of the fact that I have been teaching synchronous online classes from my basement for the past 11 months; In spite of the fact that I have been teaching online for over 2 decades; I want you to know that sometimes things go wrong in online classes for me too.

Today, I was just beginning to teach my Ed Tech and Design course through Zoom. I had EVERYTHING prepared. My screen was shared so we could review our schedule and the requirements for the upcoming assignment. I had already spoken with each of my 36 students by asking them the question of the day. Each of my students had already renamed themselves by putting their group numbers at the beginning of their names to make it easier to break them up for their group work later.

Suddenly, my MacBook Air's screen WENT BLANK . . .

My lifeless computer stared back at me as I tried to make sense of the situation. My students were gone and my computer wasn't working. I was cut off from my class. I hadn't checked to ensure that my laptop was charged and it died. My students were left leaderless in my Zoom classroom.

I immediately phoned my Graduate Assistant, Lindsey. She answered quickly My computer connection was cut so I needed to reconnect another way. Lindsey affirmed that they had noticed that I had disappeared. I had not yet made her co-host so hosting had been passed to a student . . . How embarrassing! When Lindsey discovered the host, they asked the new "chief of the class" to make them host.

My computer was busy recharging so I hung up from Lindsey, and signed into Zoom with my phone. This allowed me to address the class to start them with their class activities. The next activity was Breakout Room group work. Lindsey placed them all in groups and sent them on their way to collaboration.

My computer soon regained consciousness. I was able to sign back into Zoom to regain control of my class. Things went well after that.

This was embarrassing, but it was a learning experience as well.

Here are some of my Lessons Learned:
  1. Remember to have your laptop plugged in before you begin class.
  2. Have your laptop charged before class.
  3. Add this plugged in/charged reminder to your checklist. (You may remember that last week I posted my checklist in prep for a Zoom class. You will notice that I have since added this to the list - near the top.)
  4. ALWAYS assign your assistant as Co-Host before class.

John Dewey once said:

"Failure is Instructive.
The person who REALLY THINKS, learns quite as much from their failures as from their successes."

Hopefully, I will REALLY THINK and learn from this in the future.

What about you? Have you ever had this happen to you?


Monday, February 08, 2021

My Educator's Checklist for Successful Zoom Sessions

I have had a number of educators ask me how I prepare for teaching through Zoom.  

Aside from outlining my class session, I have a number of items that I want to remember to ensure a successful class.  Remember that these are what I like to use.  I would be fascinated to hear about the items on your checklist as you move into a Zoom session.

Checklists are incredibly important for presenting an effective session.  Most of us have them in our heads, but it wasn't until I created a written version and hung it on my wall that the checklist really improved the quality of my sessions. This is what I use:

Before Your Zoom Session:

  • Restart Computer (?) - Since most of us are teaching on laptops, it's easy to keep your computer on ALL THE TIME.  Sure, you might put it in Sleep mode every night, but as we work various programs and tabs and ???, it is easy to fill your computer's memory with useless RAM-ivorous memory gobblers. These gobblers can get in the way of your computer running efficiently so it is best to rid your system of them at least once a week. You don't have to restart before each class but reboot your computer at least once a week.
  • Laptop is Plugged-in or Fully Charged - Your computer can die on you in the middle of class. This can lead to your students disappearing from your screen and you disappearing from their Zoom class. This may sound obvious, but I began a class running on my MacBook's battery and it died in the middle of class. I returned in a timely fashion but it was embarassing and interfered with their learning.
  • Close the Door - I am an active teacher who believes that laughing and interacting with my students is an essential part of a good learning situation. This means that I need to close the door so as not to interfere with other people in my house.
  • Fill my Water Glass - You need to be comfortable when you teach so identify the "creature comfort necessities" that you need and ensure that you have them all at hand.
  • Pad of Paper and Pen - I use Notes and Google Keep for notes, but I still seem to need to have a pad of paper for quick notes. Using a couple of notebooks which are each divided into 5 parts, I can organize my notes by topic.  It's always good to have a couple of pens available.
  • Check the Mic and Camera - I use the camera on my laptop, but I always try to clean the lens using an eyeglass cleaning cloth before class.  I have an external mic so I check the USB connection and test the quality of my recording.  If you are running multiple cameras, plug them all into your computer.
  • Check for Host/Cohost - Usually, when you begin your Zoom session, you are the host by default. Don't Assume ANYTHING! Today, 10 minutes into class, I found that I wasn't hosting.  NO ONE was host. I don't remember how, but I had to sign-in again to claim Hostdom.
  • Add your Assistant as Cohost - My Graduate Assistant, Lindsey, is a valuable support person. Your support people should be your cohost.  ALERT: If your assistant is going to organize your breakout rooms, they MUST be made the HOST and you take on the role of CO-HOST.
  • Label the Breakout Rooms - It is easier if you already have the breakout rooms labeled if you are going to be manually putting students in breakout rooms or you will allow them to enter their own.
  • Turn Off Breakout Rooms Timer - Zoom's capability to time a breakout room meeting is useful. Unfortunately, it has caused some of my Breakouts to end prematurely. I have had 15-minute meetings end in 8 minutes because the timer had been set to 8 minutes and I hadn't changed it.  The WORSE PART of this is that there is no way to change the time setting once the meeting has started. PLEASE FIX THIS ZOOM. Until then, I try to just turn off the timer.
  • Test Sharing Your Screen - Test your processes like Sharing Screens before class. It is too easy for this to be a problem and roadblock in the class.
  • Test your Presentation - If you are using a slide show to supplement/guide your class, you MUST test this before class begins.  Thoughtfully go through your presentation as a presentation to ensure that all of the videos work and the animation provides the effect that you planned.
  • Preload Links into Tabs - Linking to other websites is an important function of my slides.  Often it takes a long time to load.  This causes an unwanted delay. Preloading these sites to various Chrome tabs is a good way to reduce potential delays.
In Session:
  • Start Recording - I usually ask a student or my Graduate Assistant to help me remember to record each class session, but there are times when that doesn't work either.  Keep it on your checklist.

After Session:
  • Save your Chat - Chats hold important information.  It is possible to set your settings so that your class's chats are saved automatically, but ALWAYS save your chats.
  • Convert your Recording - You have to quit Zoom to convert your class session recording, but it is best if you do this immediately after your class. I don't know what the formula is to compute how long it will take to convert your recording, but my hour-long sessions usually take about 15 minutes to convert.  
  • Save your Converted Recording to Google Drive - I save my recordings to my computer and then copy them to Google Drive so that students can access them. Last week, I realized that I can tell Zoom where to save the converted file.  Turns out that I can direct it specifically to my Google Drive. This saves a lot of time because I don't have to do it separately after it is save on my computer harddrive.
  • Include a Link from my LMS folder to a Recording - Making a recording of your class sessions is not useful unless you have a link for your students to follow it.  I have a specific place in my LMS system where my students can go to find the link.     

Thursday, January 21, 2021

9 Strategies to Optimize your Zoom Bandwidth

ARRRRRGH!  

My Zoom is SO SLOW!

Ever heard that?  Ever felt that? Watching your zoom session freeze up or listening to your students' garbled talk because your throughput is too slow is frustrating. 

It's NOT a Zoom problem. It's your Throughput.

Throughput is a combination of bandwidth and computer speed. Bandwidth may be out of your control. But there are strategies that you can take to optimize how fast your system runs once the signal enters your home.

Whether the bandwidth slowdown is on your computer or on your students' computers, here are nine strategies to speed up your throughput:

Turn Off Your Camera - This is the easiest step of all. Streaming video is 10 times the data load of streaming voice (Abbott, T, 2020) It has been suggested that muting yourself will even save few bits as well.  This option is the one that is most disliked by teachers because we want to interact with our students - but sometimes the elements require it.

Close EVERYTHING Else - Run Zoom by itself. Having other programs open while running Zoom will steal your computer's processing power and slow down your Zoom experience.

Reboot Your Computer - This may sound drastic, but it is the only way that you can ensure that you don't have any other programs running. Actually, it is a good idea to reboot your computer at least once a week to refresh your system.

Delete Programs You Never Use - You must keep 15-20% of your hard drive empty. Your computer uses your hard drive to create temporary files and swap them as it works. If there isn't enough empty space, the process becomes a little more complicated and can slow down your Zoom session. 

Move Closer to your Router - Wifi is a fickle pickle. When your computer is near your router, the signal is stronger.  As you move away, the signal becomes weaker and your bandwidth is slower. Moving closer to your router doesn't have to mean that you have to move to the basement. You can sit in a room directly above your router and the wifi will travel through the floor.

Check for Viruses - Viruses are designed to cause trouble for your computer. A strong indicator that you might have a virus of seeing your computer slow down. Infection can usually be prevented by using antivirus software to filter what enters your computer.  You can use these programs to remove invaders or you can take your computer to the repair shop.

Is Your Software Version Up-to-Date? - Improving technology is an ongoing process. Zoom released an average of about 10 minor version updates each month for the last half of 2020. Not all of them were significant changes, but it becomes increasingly important to stay current.

You can check how current your Zoom version is by clicking on your profile (upper-right corner of your opening page). A menu will appear (see image) and the Check for Updates option is the ninth one down. Zoom usually checks for updates when it opens, and often it installs the updates for you. If your Zoom doesn't seem to be doing this, check with your IT department.

Your operating system is important too. Microsoft releases major updates for Windows twice a year with minor updates every month (on Patch Tuesday). Apple releases a major update once a year in October and then minor updates every few months.  Keep your system updated.

Is Your Computer Ancient? - You should expect to replace your computer every 3 - 4 years. The hardware may still function, but technology is developing rapidly and your computer may not have what it needs to run Zoom.  

Is Your Router Sufficient? - Routers are advancing just a quickly as all other technologies. If your connection is slow, it might mean that you are in the market for a new router. Talk with your Internet service about this. You can get a new router sufficient for your home for under $100. 

I hope that you have found this helpful. Please tell me which strategies work for you. 

Let's Connect with Our Students!


P.S. Of course, I have found more strategies. Instead of having to keep updating the number in the title, I will just add these ideas down here along with who shared them.

10. Keep your virtual desktop clear.  Similar to keeping your drive clear, having a load of icons scattered around your desktop provides more load on your processor to deal with them.  (Thanks, Jeffrey Zeitz)

Wednesday, January 20, 2021

Using Zoom on a Phone or Tablet

Using Zoom on a laptop computer can be easy.  If you are attending a class, you just need to enter the class and engage in what your teacher has planned for you. 

But what if you have to use your phone or tablet?  How can you do all of the operations that are required in an engaging class?   Is it possible to TEACH through Zoom on a phone or tablet?

The answer is FOR THE MOST PART - YES!!!  Most of the commands that you can do on a computer can be achieved on your mobile device.

Here is a list Mobile Zoom commands. (Warning, this was tested on an iPhone.  Android and iPhone apps are virtually the same, but if you find that this doesn't work on your Android, please leave a comment or contact me at @zeitz)

These commands are presented in the order that we are presenting these actions in our OK Zoomer: Beyond the Basics workshop.  It is a workshop that has been enjoyed by over 2200 faculty members so you should check it out.

Mute and Unmute Yourself

  1. Tap the icon in lower-left corner.

How to Enter Chat

  1. Tap in the lower-right corner.

  2. Tap Chat in the menu.

Hide Non-Video Participants

  1. Tap in the lower-right corner.

  2. Tap Meeting Settings in the menu.

  3. Deselect the slide bar for Show Non-Video Participants.

Share Screen> Advanced>Music Or Computer Sound Only
  1. Tap Share Screen in the menu.
  2. Tap Screen.
  3. Tap Start Broadcast.
  4. Tap the screen.
  5. Share Device Audio: should be On.
  6. Move to your music application.

Rename Yourself

  1. Tap on Participants
  2. Tap on your name.
  3. Tap on Rename.

Opening Green Screens

  1. Tap the in the lower right corner.

  2. Tap Virtual Background

  3. Tap the desired background

Adding Green Screens

  1. Tap the + button in the lower-right corner.

  2. You might see a screen asking you to give Zoom access to your photos,  

    1. Tap the Change Settings button

    2. Tap Photos

    3. Tap All Photos or Selected Photos

    4. You will have to rejoin Zoom

  3. Tap the + button again in the lower right corner.

  4. Select the photo you want to use as a background.

  5. It should appear on your background and be added to your collection.


I hope that you find this useful. I will be updating these commands as time progresses.

Z

Friday, January 15, 2021

Taking Attendance using Zoom Reports

Welcome to the World of Online Learning!!!

We have SO MANY opportunities in our online classes, but there are still administrative duties that we have to complete.  One of those seemingly trivial but important tasks is Taking Attendance.  How can we do that?

In our regular, face-to-face class, we can create a seating chart and then just check off the empty desks on the chart.  Unfortunately, in Zoom (and other online networks) seating charts aren't available.  Therefore we must find some other ways to take attendance.  

I have tried a number of interesting strategies for taking attendance.  We have used QR codes that lead to Google Forms.  We have had students type "Here" in the Chat Room and saved the Chat Room for later review.  Sometimes we have taken screen captures of the students in who are in class for later reference. We have even tried having all of the students wait in the waiting room and checking off the attendance sheet before admitting them.

HOLD ON!!! I have found the SUPERIOR method for taking attendance!! 
Use the Zoom Reports feature!!

While this may seem like an obvious answer to the task, not too many people know about the extensive Zoom Reports that are available.  They tell you WHO attended, WHEN they joined, WHEN they left AND the content can be exported to a spreadsheet.

Instructions on How to Take Attendance during a Zoom Class

Access the Settings on Your Zoom Web Portal. 

  • Access this through the zoom.us website address used by your school, or you can access it from your profile on your Zoom Client App. 
    • Select Settings and then View More Settings.
    • If you don't see the left-hand column when you access More Settings, widen your window to full screen. Zoom doesn't show the left column is the window where it is displaying is too narrow. 


Select Reports
in the left column. (If you don't see the left-hand column, widen your window to full screen. Zoom doesn't show the left column if the displaying window is too narrow.)


Click Usage
and it will open a list of reports generated for meetings between specific dates.  
  • Select the dates to find the report you want.


Click on the Number of Participants
for your desired meeting to view the class list. It should be blue.


Attendance List: You will find a list of all of those who attended.  It will tell you when they started, when they ended, and how many minutes they were there.  This can be exported to a spreadsheet in .CSV format if you want to alphabetize the names or store them for later reference.

There you have it.  Have you tried this before?  If not, give it a shot and tell us how it worked.
How have YOU been taking attendance with your online classes?

Z

ATTENTION:  I just learned that the Canvas LMS team learned about this option and they have built it into their attendance system.  I don't know anything more than that, but look into it.  Blackboard hasn't shown the foresight to incorporate it into their system.    2/15/21

Thursday, January 07, 2021

Dr. Z's Guide to Teaching Using Zoom Breakout Rooms


One of the most important but often most daunting tools is the Zoom Breakout Room.  

The concept of Zoom Breakout Rooms is not difficult.  They can be the same as small group discussion in a physical classroom setting. 

The trick is which option to use for setting them up and then understanding the tips and tricks for running them smoothly.

This guide provides an easy-to-understand description of Zoom Breakout Rooms basics.  It has been updated to include the new 3rd option where students can select rooms on their own.

This will be followed up with a booklet on the pedagogical uses of Zoom Breakout Rooms to suggest a plethora of learning opportunities that can be provided using them. 

NOTE: This guide is a little out-of-date, but the updated version is coming soon. 

Click Here to Open the Guide.

Wednesday, January 06, 2021

Dr. Z's 20 Zoom Keyboard Shortcuts for Mac and Windows

Click Here to Access the Whole Zoom Keyboard Shortcuts


ZOOM IS AWESOME!!

Right?  It enables you to connect with colleagues, family, students, teachers, customers, and everyone else.  You can attend online classes through Zoom. You can participate in virtual conferences and conventions.  You can even attend church with your friends and family (or anywhere in the world.)

As exciting as Zoom may be, it can be overwhelming.  There are SOOOO many buttons to click and menus to use.  Unmute me. Stop my video. Raise my hand. Share my screen. Jump to the next screen of participants. It can be TOO MUCH!!! It would be much easier if we just knew the Magic Keys to press to make things happen.           

At least that is what I was thinking . . .

I searched everywhere for a table of these commands.  I wanted it for my Mac but many of my students use Windows so I wanted both.  Zoom had lists of commands.  Many websites contained their own lists of commands, but I wanted a TABLE.  That's how I think.

So . . . I created a Table of Zoom Keyboard Shortcuts for Mac and Window

There was much to learn while I collected these shortcuts.  Did you know that:
  • if you are muted, you only have to press the SPACE BAR to temporarily unmute yourself?
  • you can raise or lower your hand using Alt-Y (on both platforms)?
  • you can show/hide the chat room using Command-Shift-H (or Alt-H on Windows)?
  • on Windows, you can flip between pages of participants using PageDown or PageUp?
  • Windows uses the F6 to flip between Zoom Windows.  This is great when you have too many open windows on your screen and get lost.  Hit F6 a few times and you will get where you want to be.
You will notice that the letters used for each command are the same on both platforms.  Windows usually uses the Alt key.  Mac uses the Alt key too, but it is also labeled as Option.

I am still on the lookout for some keyboard shortcuts:
  • Zoom Window Navigation shortcut on my Mac.
  • Flip between Gallery View and Active Speaker shortcut on my Mac.
  • Rename shortcut for either platform
  • Hide Non-Video Participants shortcut as well. 
Readers: Do you know any of these shortcuts?  if so, send me a note and I will include them.

ZOOM VIDEO CORP . . . CAN YOU HEAR ME?   Please expand your Zoom Keyboard Shortcuts using some of these suggestions.  You have an incredible product and we just want to help you make it better.

Z

Tuesday, January 05, 2021

How to Write a Paper in a Weekend - Dr. Carr

The toughest part about writing a paper is "getting to it."  

I was cruizing YouTube tonight (instead of doing the writing I needed to do) when I found this 12-minute video about how to write a paper in a weekend.  This video is not fancy.  Dr. Pete Carr shares his insight into what it takes to layout the first draft of a research paper.

While Dr. Pete Carr is talking about an experimental research paper, the same holds true for a literature review, an argumentative review, or any other type of paper that you write.  Important points are made throughout the video but here are some of the high points.

  • Get To It!!! - Don't procrastinate.  Set a time to begin and get started.
  • This is your First Draft - This is the Creative Part. Don't worry about making the perfect sentence. Organize the basics and leave the final editing till later.
  • Do your literature research first - you have already reviewed the materials that you will use as a foundation for your paper (Experimental or Lit Review). Put them in order using tables or figures.
  • Identify your audience.  - No matter who you select, remember the reviewers.
  • Use an Outline. - Get your ideas together. You will probably not be writing this in a single sitting, so get your ideas together to corral your content.
  • Don't write the Introduction FIRST!! - The Introduction is the hardest part to write. Begin by writing the more concrete content - Methodology, Results, Discussion.  These are more concrete so easier to write.
  • Write the Conclusion - It is easiest if you number these separate conclusions.
  • Write the Introduction - At Last!! Why was the study done?  Provide the "relevant background information" to create the foundation for the work that you have already written.
  • Produce the References - Collect the references you have already found.  If you find that there are some holes in your collection, DON'T search for them now. Make a note and find the AFTER you have completed your rough draft.
You have completed your rough draft.  Now it is time for you to focus on your critical skills and clean it up.

Dr. Carr completes with a list of recommended references.

This is a must-see video for all students and professors.  It makes it easier to approach the process and validates the fears you might have.  Most importantly, it provides suggestions for overcoming those barriers.

Thank you, Dr. Carr, and Happy Writing Everyone!!!

Tuesday, December 01, 2020

105 Ways Educators Provoke Curiosity in their Classrooms

Provoking Curiosity Word Cloud
What can you get when you ask 330 educators about how they Provoke Curiosity in their Classrooms?  You can get 105 sets of ideas that you might want to use with YOUR students.  

As you read in my last posting, I am spending this week online enjoying the ISTE20 LIVE virtual conference. Yesterday, Barbara Bray and Kerry Gallagher and I presented our Experiencing Curiosity, Play, and Joy in Learning session. It was a BLAST but more importantly, our attendee educators shared a plethora of ideas for igniting curiosity in their students.

After introducing our discussion about Curiosity, I decided to ask our virtual room full of educators to share what they did to spark their students' curiosity.

Provoke Curiosity

Since we were online, I couldn't ask 330 individuals to raise their hands and tell us their strategies, so we used the Chat Room to get their input. The problem with using chat rooms for people to enter multiple sentence answers is that not everyone can type quickly. Some people can enter their complete answer while others are rushed. 

We asked them to enter their ideas in chat but NOT click the SEND button. I gave them 90 seconds to enter their ideas and then, as a group, we ALL clicked the SEND button at the same time. *

As you might guess, we were flooded with chat ideas. It was amazing.  These were important so I gave them another 60 seconds to review them.  

As you might guess, they didn't get a chance to review all of them so I have posted their ideas below.


How Do You Spark Curiosity In Your Students?

  • QFT- Question Formulation Technique to get kids (and adults) to generate questions and narrow focus for inquiry
  • Book talks
  • 101qs.com, Problem-Based Learning, driving questions, asking questions when asked questions, putting a picture on a screen and having student create the question
  • Using an interesting picture as a writing prompt
  • Asking questions, providing labs/experiments/situations for students to observe and be curious about, using inquiry based learning, encourage students to play!
  • Why questions ... mysteries to solve
  • Flipping lessons- letting the students lead the way!
  • Asking questions. Thought puzzles. Brain-teasers. Wait time!
  • Design Thinking projects & using hidden pictures based on answers with conditional formatting in Sheets.
  • Reading. Listening to podcasts. creative arts processing
  • Maker Lab; Jamboard; asking students to notice; encouraging reading;
  • Notice and wonder
  • Providing puzzles, playing games, setting up a problem to solve, provide manipulatives, asking for multiple answers
  • We celebrate "button poking" - that is, we cheer on students who try things without having any idea what might happen just because (poke buttons to see what they do) or to solve a problem.
  • Creating Project-based learning based on interests- student choice!!
  • Pose an intriguing question
  • By being here at the ISTE conference to learn new interesting skills
  • Showing images from new topics for students to notice and wonder about. In virtual I use Jamboard for this. :-)
  • Hidden surprise in every lesson - did you find it? Wait until the end of class to write it on your ticket!
  • Weekly ed tech newsletter
  • Process Art
  • Field trip experiences!
  • Show how a programmed robot works, and then allow the students to reconstruct the code without seeing how it was done.
  • Makerspaces, choice centers, sketchbooks prompts- answering them and drawing them and writing them for the rest of the school
  • Giving time for educators a chance to ask and answer their own questions thru inquiry
  • Read an excerpt from a chapter book and stop at the cliffhanger to get kids to check the book out from the library.
  • Ask the question beginning "what if...?"
  • Project Lead The Way
  • Questions, photos, partial storytelling... leaving the rest of the story.
  • Use the Challenge-based learning model to spark creative learner-led solutions
  • HyperDocs with reflection questions posed in "why"
  • Newsletters highlighting teachers who are using those strategies that other teachers might want to try. I also just ask "what is your biggest issues right now?" and work together to solve them
  • When asked a question, say: "I don't know, how can we find out?"
  • Disruptus
  • Spark Curiosity by asking students --> What do you THINK you know? What do you WANT to know?
  • Breakout boxes, mystery piles of books on the tables in the library
  • The electoral college, 2 party system,
  • More student agency!
  • STEM, PBL, Talking circles, Genius Hours, Coding
  • Research, Open ending questions,
  • Using images and video clips to get students into inquiry mode before introducing a big topic.
  • Look for discrepant event to engage surprise
  • Using different apps like quizziz
  • Asking questions, showing an image or video snippet, genius hour, giving 'playground time' when first trying a new tech tool
  • Genius Hour
  • Using mentor texts that get kids' attention.
  • Share a story with a cliffhanger ending.
  • Giving a teaser for "freebies" or templates at the end of teacher PD, but not saying what they are or what they look like.
  • Have the kids ask a question about their community - what is something relevant to them? Then work collaboratively to create a solution.
  • What do you notice, what do you wonder?
  • Visible thinking routine, morning centres,
  • Check-in questions
  • Use the "What's happening in this Picture?" to generate questions....and then discuss all the questions....and then reveal the answer (got the idea from NY Times)
  • The wall of why- lists of wonderings to tackle during why-finding Fridays
  • Open-ended questioning with adults
  • Question of the week on Flipgrid. I used to do 20 Time!
  • I love to spark creativity with music and humor
  • Deep questioning, hands-on displays, posters with interesting graphics, demonstrations
  • Using Images and Objects. Students are required to pose questions about a visual presented, and their wonderings can often lead the conversation in variety of directions.
  • I use visuals that make my students wonder about the upcoming unit.
  • #AdobeCreativeEducator
  • Starting with something engaging (a video clip, mystery science, trick, challenge, etc)
  • Instead of asking pre-determined discussion questions, after reading a piece, I ask, "What's discussion-worthy here?" They always notice everything I wanted them to, plus more :)
  • Ask questions about crazy animals facts, such as "Do cockatoos play catch?" Let them predict their answer, and then share a video.
  • I do games to let them know what the class is going to be about, I play hangman or memory
  • Hands-on projects and games
  • Jamboard and Menti
  • I'm inviting my students to design their own questions before starting their research
  • I show the students that I'm the learner.
  • Asking engaging questions, ice breakers, games, movement, STEM, student choice
  • Personal connections and interests - Open exploration of online resources
  • Pictures, videos,
  • Inquiry, letting students take the lead, problem-based learning, multimedia, student creation
  • Experimentation.
  • Flipgrid
  • Tying content to interests or something that matters to the individual
  • Design challenges for teachers
  • 3 Reads, Notice and wonder, stem activities, phenomena based instruction
  • Stories: Tell a story through puppets, but leave the end for them to discover it in the reading.
  • Ouch.... Curiosity in the classroom..... I worry that I am not curious enough this year!
  • #BreakISTEchat
  • I bring in random objects or images and teach students to ask questions. Tinker!!!
  • Jamboard
  • Makerspace challenges
  • Inquiry process and questioning
  • Read the first 2 chapters only of a book then place in our class library for children to finish
  • I teach higher ed ELL where wonder and curiosity are often ignored/forgotten.

* This is a strategy that I learned from Dr. Doug Shaw. He calls it "Enter Key is Lava" because it is untouchable.

Word Cloud Image: Dr. Gordon Dahlby

Experiencing Curiosity, Play, and Joy in Learning @ ISTE20 LIVE

IT'S HERE!!!! 

ISTE20 LIVE is here and it is incredible.

Every year for the past 30 years, I have packed up my laptop, suitcase, and dreams to travel to a distant city for a week at the end of June and beginning of July.  This was to attend the ISTE conference.  I have visited Nashville, Minneapolis, Philadelphia, San Diego, San Antonio, Atlanta, Denver, Seattle, and a few other metropolitan areas that slip my mind.  It was an annual pilgrimage.

At first, this gathering was named NECC (National Educational Computer Conference).  (There is a long and complicated story about NECC. We won't get into it here.)  In 2008 (I think), they added ISTE to the name and it became the ISTE Conference. This past year they decided to name it ISTE20. Only problem was that ISTE20 was one of the COVID-19 casualties. Instead of meeting in a hotel or conference center at the end of June, ISTE is meeting virtually for the week after Thanksgiving.

I must admit that I went to ISTE to see old friends and make new ones. I really didn't attend a lot of sessions.  This year is a whole new experience because we can't bump into old friends and have a coffee with them. We are using a webinar platform that ISTE created.  This is its first run.  There are a few rough spots, but their amazing staff is doing a good job of supporting the presenters.
 

Curiosity, Play, and Joy

This year, I was graciously invited by Barbara Bray to join her and Kerry Gallaher in a Celebration of Learning. This wasn't your run-of-the-mill presentation. It was a Party filled with Dancing, Magic, and Interaction.

Would you believe that we had 330 educators attend our presentation?  It was INCREDIBLE.

Barb began by inviting our guests to find a JOYFUL picture on their phone and share it on Padlet.  Would you believe that this yielded over 180 pictures?

Curiosity?

I explored Curiosity.  It began as I engaged in some mysterious magic.   I shared a card with dancing spots.  There were 3 on this side, 4 on that side, 1 on the other side, and 6 on the other. Having sparked their curiosity, I began talking about Provoking Curiosity in learners. The BIG WIN was when I asked them to share how they Sparked Curiosity in their students.  I asked them to type their ideas in the chat room but NOT click the send button. I gave them 90 seconds to share their ideas and then they all clicked the button simultaneously.  We experienced a barrage of over 100 ideas. For your interest, I have collected these ideas and they will be shared in a later post on Dr. Z Reflects. 

Play

Kerry Galagher connected Play with Student Identity.  She shared how students often used Play to connect with others and establish their own identities. Kerry integrated Pear Deck into our celebration. Pear Deck is a presentation add-on that enables students to answer questions, take polls, share ideas, and even draw pictures on the slideshow their teacher is using.  I had known about Pear Deck for years, but I had never used it.  I will surely use it next semester in my classes. 

Joy

Barbara ended our celebration with dancing Joy.  You may not know this, but Barb is an experienced Choreographer. She showed this through a short video where she shared half a dozen dance moves. Then she invited our 330 viewers into breakout rooms to meet other educators and practice their moves.  At the end, she invited them to move from their breakout rooms to our Danceathon. It was WONDERFUL!!

This session was like none I have ever experienced and I was excited to be part of it.

Hopefully, when we do this at next year's ISTE, we will be able to all stand in the same room and dance with each other!!

See you then,

Z

BTW, ISTE20 LIVE is still going.  It will continue until Saturday (I will give 2 presentations on Saturday).  If you are already enrolled, maybe I will see you there. If not,  Register now - it will be worth your time.

Tuesday, October 27, 2020

Switching Cameras on Zoom = Document Camera

I FOUND IT!
 I FOUND IT!!!

I found the answer to the question that many educators have been asking:

"How can I connect a document camera to my laptop for my Zoom classes?"

The answer is: 

                     SHIFT-COMMAND-N (or Alt-N for Windows users)

What does this mean, you say? This is your Keyboard Shortcut for Switching Cameras.

THE DOCUMENT CAMERA CHALLENGE

You want to share papers or browse through books or write formulas on paper in such a way that your students can see them.  The problem is how can they will be able to see them?  You probably can't bring home the document camera from school or maybe you can't figure out how to integrate your document camera into your Zoom session.

THE ANSWER

Computer with webcam positioned over a sheet of paper to demonstrate how this might be arranged.
The answer is to use another camera that is held by an overhead camera holder. This camera holder could be one that you purchase (gooseneck or tripod) or a DIY camera holder.   The camera could be your webcam, your phone, or a tablet. Just as long as it is  connected to our laptop with a USB cable. (You could use wireless, but it can be trickier.)

Position the camera above the paper and plug it into your USB port.  Write on the paper and it will be captured through the camera.

The problem has been how to switch between cameras?  What do you click to tell Zoom to transfer from your laptop camera to the USB camera and back again?  

The popular answer to this has been to make your changes through the Share Screen menu.  This meant that you had to click on the green box and then change the source for your sharing.

Then came SHIFT-COMMAND-N (or Alt-N for Windows users) 

This is a Zoom Keyboard Shortcut that will quickly switch between your laptop camera and your USB camera.  You can talk with your students face-to-face and when you want to show them how to create a graph on paper, you just hit the magic keys and it switches to your USB camera over the paper where you can demonstrate the process.  Tap those keys again and it will return to your wise face so that you can tell them more about it.  You continue to use the same microphone in each case so you can talk while their eyes are trained on paper.

AMAZING, ISN'T IT?

This can be used for any situation where you want to show something other than your face - playing the piano, looking at a map, demonstrating chess moves, conducting an experiment, drawing a picture . . . the list is endless.

I know that this shortcut has been around for a long time but it is the first time that I put the two together so I thought you might like to know.

Have you already been using this?  If so, what have you done?   Just respond in the comments below.

Looking forward to hearing about your adventures.

Z

Update Sign

A question was raised about how many cameras you could use simultaneously.  We tried plugging 3 cameras into USB ports and the "magic key" combination progressed from one camera to the next in rotation.  Imagine if you set it up so that you used your laptop camera for you, one webcam over a sheet of music, and another over your piano keyboard so that you could demonstrate various fingerings and techniques.  Exciting, eh?

image: info.squarecap.com

Thursday, October 15, 2020

I Have Been Online TOO MUCH!!!!!

 THAT'S IT!!!

IT'S BEEN TOO MUCH!!!
Today I returned to campus to sign some things and do some work. I have spent most of the last 7 months teaching from home in my basement. All of my classes have been online as well as my meetings.
Just for a change, I donned my mask and walked across campus to the Union. I purchased a chocolate milk, picked up a Northern Iowan to read, walked outside, and sat on a concrete bench.
I perused the paper along with the thumbnail articles across the top. The Derecho Relief article looked interesting and would you believe that
I "clicked" it with my thumb and wondered why it didn't show me the whole article?
I need to get back into the real world. It's not as efficient sometimes, but it can be much more fun!!

What have YOU been experiencing?

Monday, August 24, 2020

Looking for a Break while Zooming?


Sign saying Be Right Back
A few years ago, I contacted Zoom and suggested that it would be useful if there was a way that I could write something on the screen so that if I had to leave my chair during my 2 hours of Zoom Student Hours.  This might be something as simple as Be Right Back!!!   

They responded by telling me what a GREAT idea that was.  I still don't see that great idea implemented. 

Today, out of desperation, I found another answer to my dilemma.  

What do you do?

Monday, June 29, 2020

9 Secrets for Successful Global Collaboration Projects

Global Collaboration projects can be incredible.  Students and teachers have the opportunity to meet and
work with people from anywhere in the world. They get to share their ideas and collaboration to create wonderful projects. They can definitely change your viewpoint about the world and those who inhabit it.

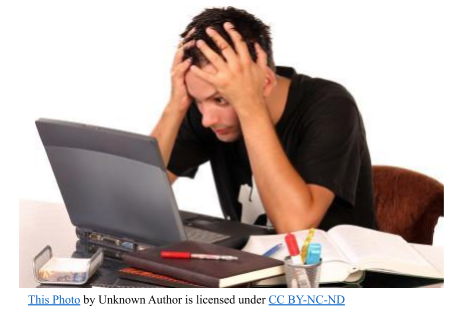
While Global Collaboration is a valuable learning opportunity, it can also be fraught with many challenges. Educators are working outside of their classrooms and many times outside of their comfort zones.  Since they are engaged with students in other places, there is always the opportunity for miscommunication and confusion.

I would like to share 9 Secrets for Success in your collaborative projects. They won't come as a big surprise because they involve many of the strategies you use when you are teaching within your own class, but I just want to remind you about them so you can use it as a check-off list when you are planning your projects.

PLEASE NOTE: These are not listed in sequential order. 
These secrets are useful for classes from K-12th grade but some examples will come from higher education


#1 - Decide on YOUR Level of Engagement

Global collaboration projects have a wide range of Engagement. These projects vary in length and complexity and it is necessary for you to decide the level of involvement that you want to experience.  Taxonomy of Global Collaboration in their book, Flattening Classroom, Engaging Minds: Move to Global Collaboration One Step at a Time (2012).  It identifies five levels of engagement. Some of these are reflected in these 9 secrets.

Your first obligation is to identify the scope of the project you want you and your students to experience:
  • Length: Some may last an hour where classes connect, interact, and disengage. (i.e., Mystery Skype)  Others might last 5 weeks while two classes in different countries collaborate to develop teacher lesson plans.  The time commitment will be more than what you do with your regular curriculum.
  • Developer:  Do you want to experience a project that has already been developed and refined or do you want to create the project yourself?
    • Sign-up for a Project - If this is you are new to global collaboration, you may find it easier if you sign-up for a project that has already been created, implemented, and coordinated.  There are a number of companies that develop and support projects. (i.e., Flat Connections, iEarn, or TakingItGlobal)
    • Develop Your Own - Adventurous educators can contact instructors they know, design a collaborative project that fits their subject needs, and engage their students in their projects. If they know what they want to do, but don't know any partners, There are resources that provide a database where educators can leave their names, subject areas, and contact information for other educators to contact to create their own projects. (i.e., Classroom Bridges)
While the following secrets will be helpful for educators who develop their own projects, they are useful for those who sign-up for their projects as well.


#2 - Develop a Passion

Connecting with other classrooms around the world is an exciting experience. It will take you far beyond your comfort zone so you need to have a passion for what you are doing that will take you where you want to go.

Passion for the Process - Global collaboration projects open the door to the world outside your four walls. Making this a reality for your students requires you to have an ambition for making a difference. It is your passion for making these connections with preservice teachers in Miami or 4th graders in Beijing or high school teachers across town adds a taste of reality that learning.   This sharing process is something that you must desire.

Passion for the Project - As you select your project, choose something that will answer some questions you and your students have about the world. You may be studying about Sustainable Development Goals in your class in Iowa, but how is it being pursued in Manitoba or Alabama or South America? Make it meaningful to you as well as your students. Engage your students in providing clean water by developing water purifiers for kids in Mozambique while learning about their African culture. Reinforce the commonality of mankind by communicating with students in Peru and learning about how their lives are similar to ours and how they are different. Feed your passion to open the world for your future citizens.


#3 - Prepare Yourself

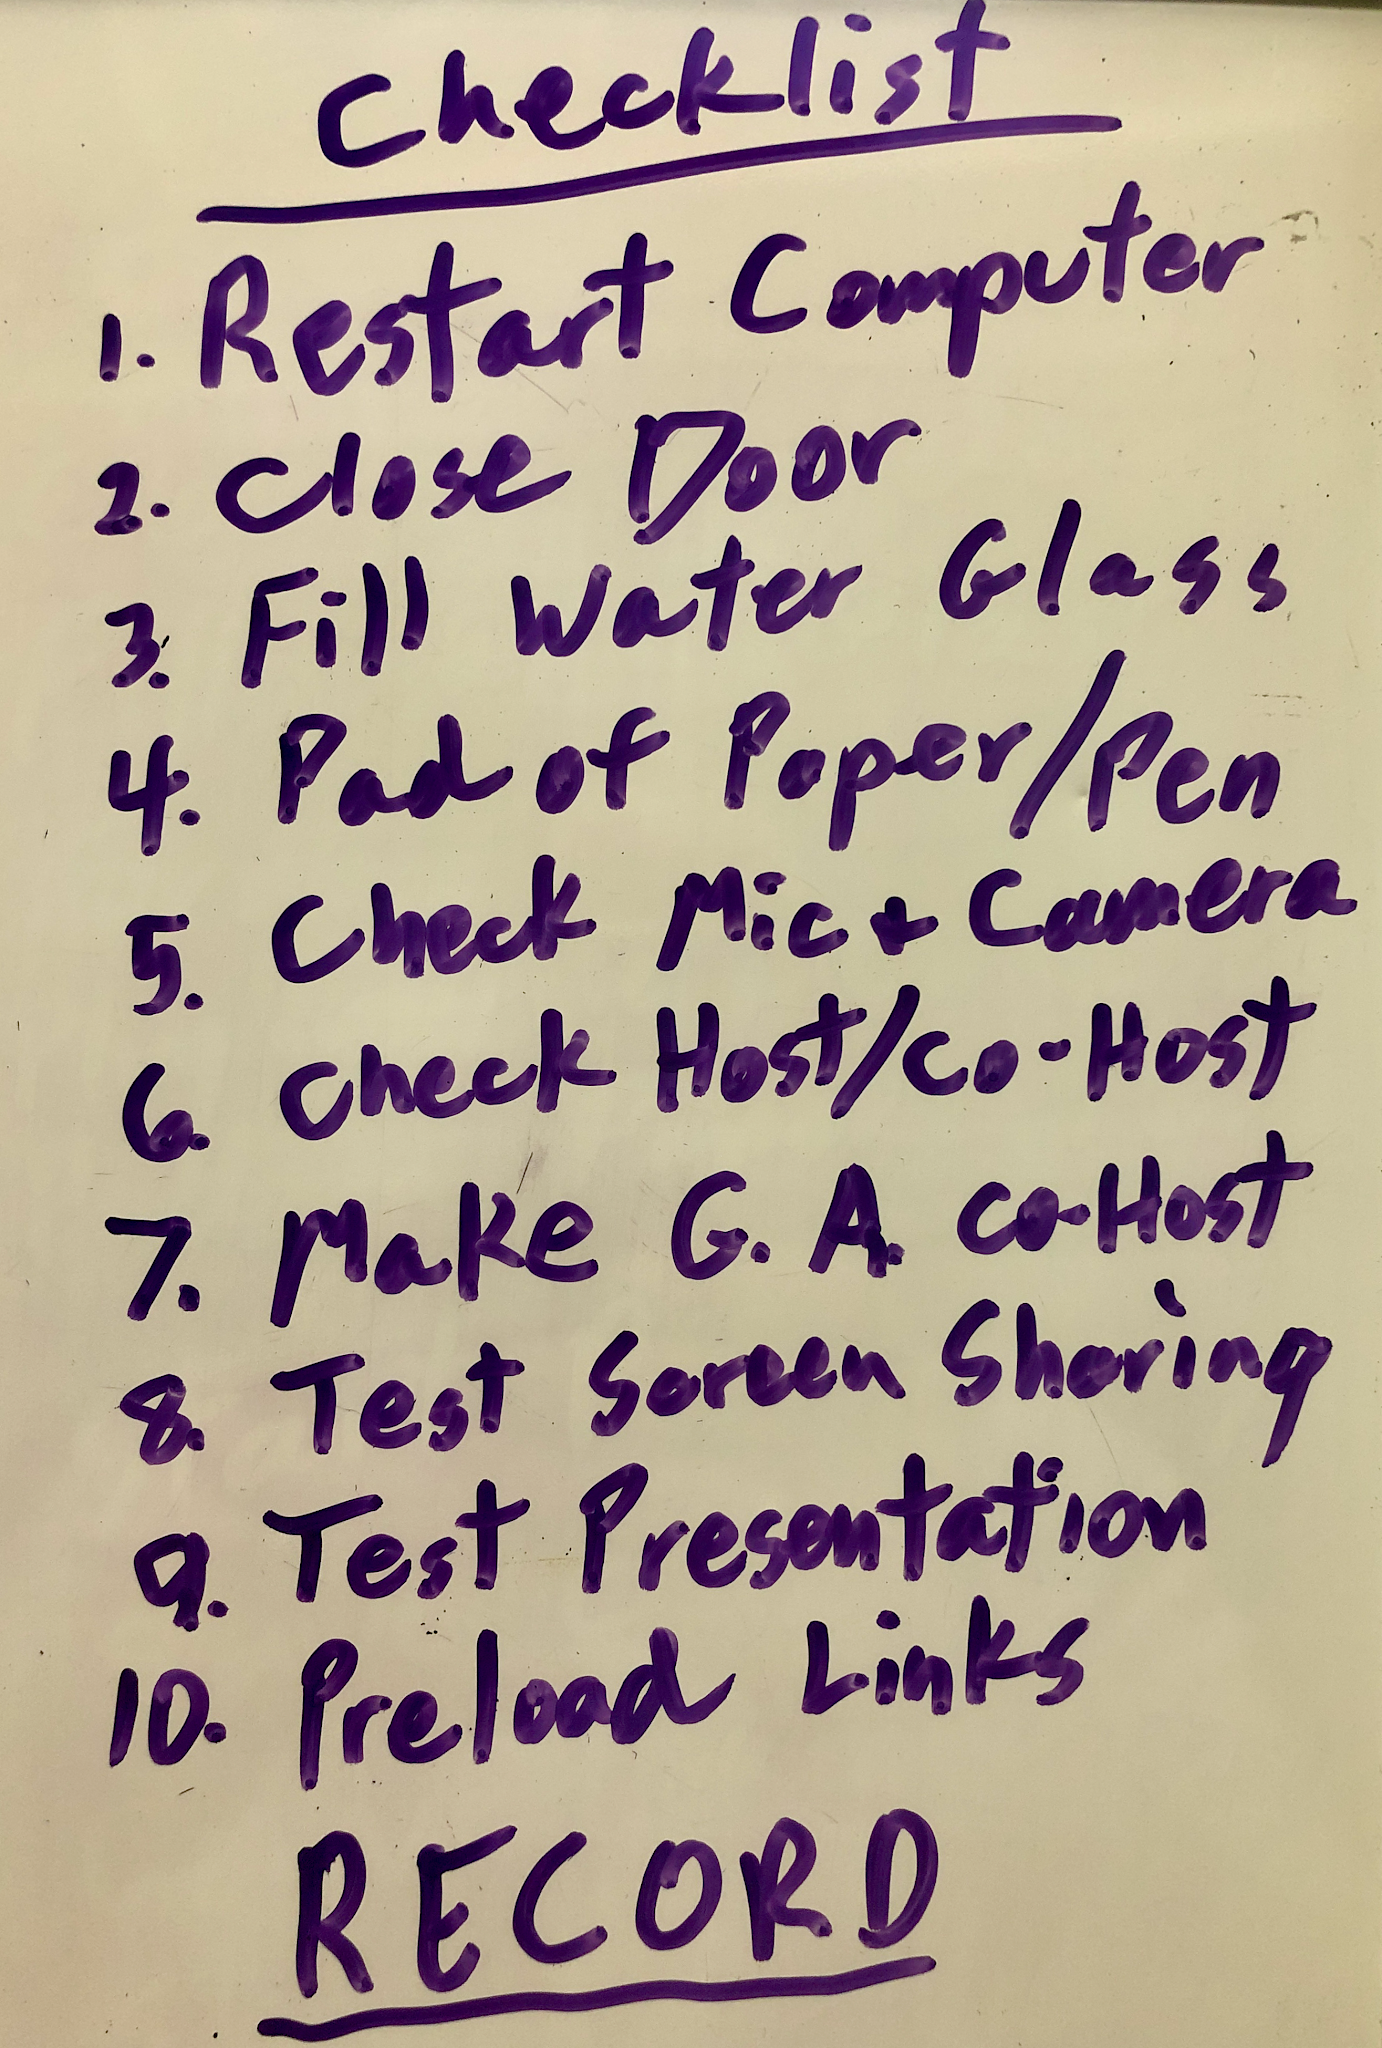
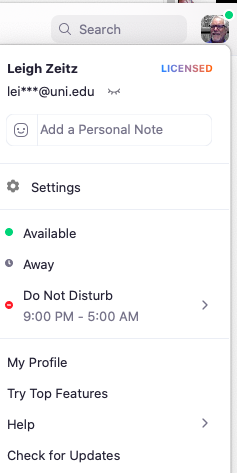
Prepare yourself personally and professionally.  Whether you are signing up to participate in a predesigned project or you are creating this project on your own, it is good to know your colleagues in the project.  If possible, learn about them and their interests through the Web. Have a couple of informal Zoom meetings where the goal is more about getting to know one another than preparing for the project. This can lay a foundation for your working relationship with your new colleagues

You are coordinating work between learners of varied interests and backgrounds. They may live in different cities, states, and time zones. Their schedules, subject areas, and background experience probably don't match. You need to prepare yourself to succeed. Research other projects similar to yours and learn what they achieved and how they accomplished it. You don't need to copy their projects, but previous experience can provide a pathway for your success.

#4 - Prepare Your Students

You must prepare your students both personally and academically.

A 5-week global collaboration project is a major undertaking. You have and will do a great deal of planning and supporting throughout this project but remember how your students must deal with this. Working with strangers at a distance is something they probably have never done before.
  • Begin by studying a subject area in your curriculum (e.g., sustainability) Introduce a strategy for solving a problem or learning more about a topic that interests them.
  • Pique their interests by investigating into an area of study (i.e., how the conservation is being integrated into schools.). 
  • Explore how it is done at your school and then challenge them with "How do you think this is achieved in other schools?" THEN, you offer them the opportunity to connect with students in another school through your global collaboration experience.
  • You will have already made the arrangements to engage them in the global project, but this is a useful and meaningful lead-in to the activity.

#5 - Practice Collaborating and Using Tools

Collaborating with students from another location can be challenging.  Making connections, scheduling work time, and coordinating work require skill and patience. It will be less challenging if your students have an opportunity to "test drive" collaboration on their "home turf. "

Engage them in a collaborative project between themselves before they venture beyond their classroom walls. This doesn't have to be something added to your curriculum. It could just be another way of completing the project they usually do BEFORE you get to the topic of this global project:
  • Break them into small groups. 
    • In the online project, you will want to create Inter-Campus Groups to foster distant collaboration.  This would mean that a group of 4 would include 2 from the distant campus and 2 from your class.
  • Require them to only communicate with each other through their computers or mobile devices. 
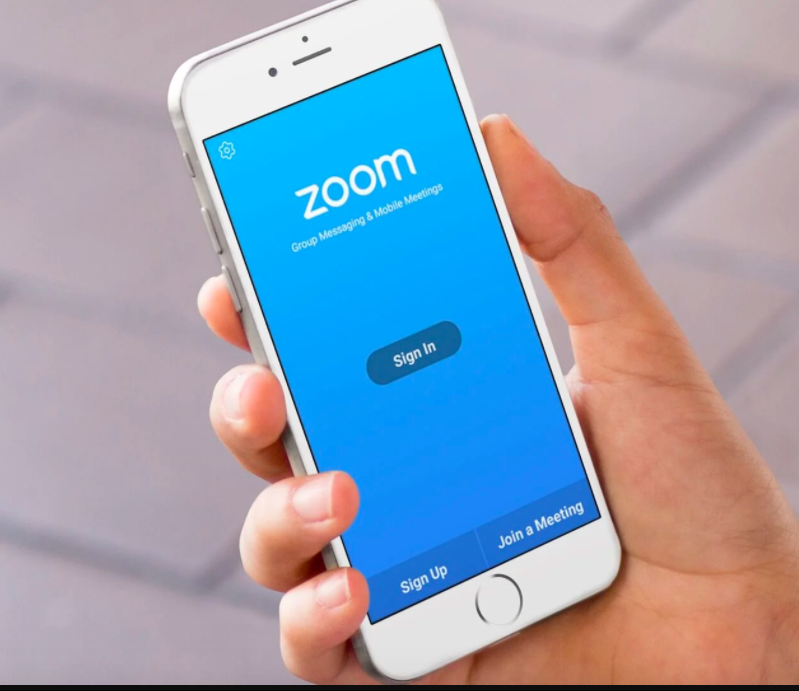
    • Engage them in using Zoom or WhatsApp for video conferencing. 
    • Use Doodle to coordinate schedules. 
    • Collect data and develop projects using the Google Suite.
  • Ask the students to synthesize their work in a final project. It doesn't have to be as elaborate as you plan to do in your inter-campus project.
This local collaboration project will provide your students with experience in coordinating their schedules, identifying times to meet, and working collaboratively to create online documents.  Discuss the process as it unfolds so that everyone can learn from the experience.

If each of the classes involved in the project involves their classmates in this initial rehearsal before they collaborate with outside members, it will ease the transition so that they can concentrate on the content instead of the process.


#6 - Identify Doable Projects

Sometimes our imaginations can extend beyond what is practical. Consider your global collaboration projects as a learning opportunity for both you (the teacher) and your students. Hopefully, this is a process that you will be able to use with all of your upcoming classes. Here are some things to consider as you identify your projects:
  • Begin small and expand with later projects. 
  • Explore subject areas and topics that you are already studying
  • Extend classroom projects 
  • Collect and compare data from different sites
  • Use your findings to support cultural conversations.  (Finding similarities and differences between counties and states can be just as interesting as differences between countries.)

#7 - Consider Your Groups' Characteristics

Matching up classes of students can be tricky at times. It is ideal to connect students in similar courses, but it is not always possible. There are many specific situations that need to be considered. These may seem obvious, but consider each carefully so that it doesn't sneak up on you in the middle of your project:
  • Subject Areas and Learning Outcomes - While a global collaborative experience can be enlightening, the projects you complete must augment the required outcomes for the class.
  • Student Status - Education programs serve both undergraduate students (pre-service teachers) and graduate students (in-service teachers). Connecting these two groups can be quite productive, but consider the differences in background and skillsets.  
  • Face-to-Face or Online - Some classes may meet face-to-face 3 times a week while other classes may be taught completely asynchronously on-line. It is an online project, but the students meeting regularly have more support from their instructor and can be 
  • Scheduled Sessions - If both classes meet regularly, often it is difficult to have direct communication if they don't meet on the same days and at the same time. 
  • Student Schedules - While some students remain on campus the whole semester, other students may have a program where they need to spend a week away from campus so it will can in the way of group collaboration.  

#8 - Agree on Outcomes and Assessment

Coordinating projects between instructors can be tricky. Educators can have varying interpretations of what is expected of the students at each level of the project. One professor may have different expectations for a lesson plan than the other. Professors may disagree on the value of one part of the project over the other.  This can be a problem because the students in the same group on different campuses would receive varying evaluations which would lead to confusion and frustration.

Before you even begin your global project, the professors must discuss and reach agreement on:
  • The Desired Final Product - Groups should be given choice about how they will complete their collaboratively-created final product, but there should be an understanding about the options available to the students.
  • Set Rubric/Expectations for the Final Project - Professors need to agree on what is expected.  Well-written rubrics don't need to constrict creativity, but students on all campuses need to know how their work will be evaluated in how well it reaches expectations.
  • Identify Benchmarks along the Way - A final product is usually the result of a number of stepping stones along the way. Learners will only see success in reaching the desired final product if they are given formative assessment from their instructor or peers throughout their journey.  If your students are creating a video, they must know what is expected and receive feedback about their idea, script, storyboard, rough video, soundtrack, and final video. 
  • Set Rubrics/Expectations for Benchmarks - Once again, professors need to agree on what they want to see with each of these benchmarks. They don't need to be formally graded. You might have different professors specialize and provide feedback for all of the scripts or each of the storyboards. Students will learn more through rich feedback than a letter grade.
  • Provide Examples - Examples can be useful to guide learners in their endeavors. Your project may have examples. It may involve finding solutions that were never done before. You may not want to influence their creativity by giving examples. Providing a spectrum of examples or similar solutions expand your learners' creativity rather than limiting it. 

#9 - Celebrate Your Achievement

Celebrate Your Achievement! Your learners have had an exciting adventure and they deserve recognition. It is an opportunity for teams to reconvene and share how they collaborated to explore, analyze, and generate a report or solution. The essence of this celebration will be determined by the circumstances.  If the collaborating students live nearby, they can get together for a face-to-face celebration. If they are at a distance, they can share their success through Zoom. If their time zones impinge upon their immediacy, presentations can be recorded and share with the other classes.
These celebrations could include:
  • Collaborative Presentations by the Learners Broadcasted through Social Media (Zoom)
  • Group Awards presented in Various Areas
  • Completion Awards
If possible, these celebrations should include lots of pizza and other festive foods at each of the locations where the learners are celebrating.

Global Collaboration can be INCREDIBLE!!  We have the opportunity to connect with other students on other continents and collaborate with them to learn and apply new ideas. The key to success is planning, engaging, and celebrating.  Hopefully, these secrets will help you in your adventures.

What are your suggestions? 

Share a comment about what YOU do to create, support, and see your projects succeed?